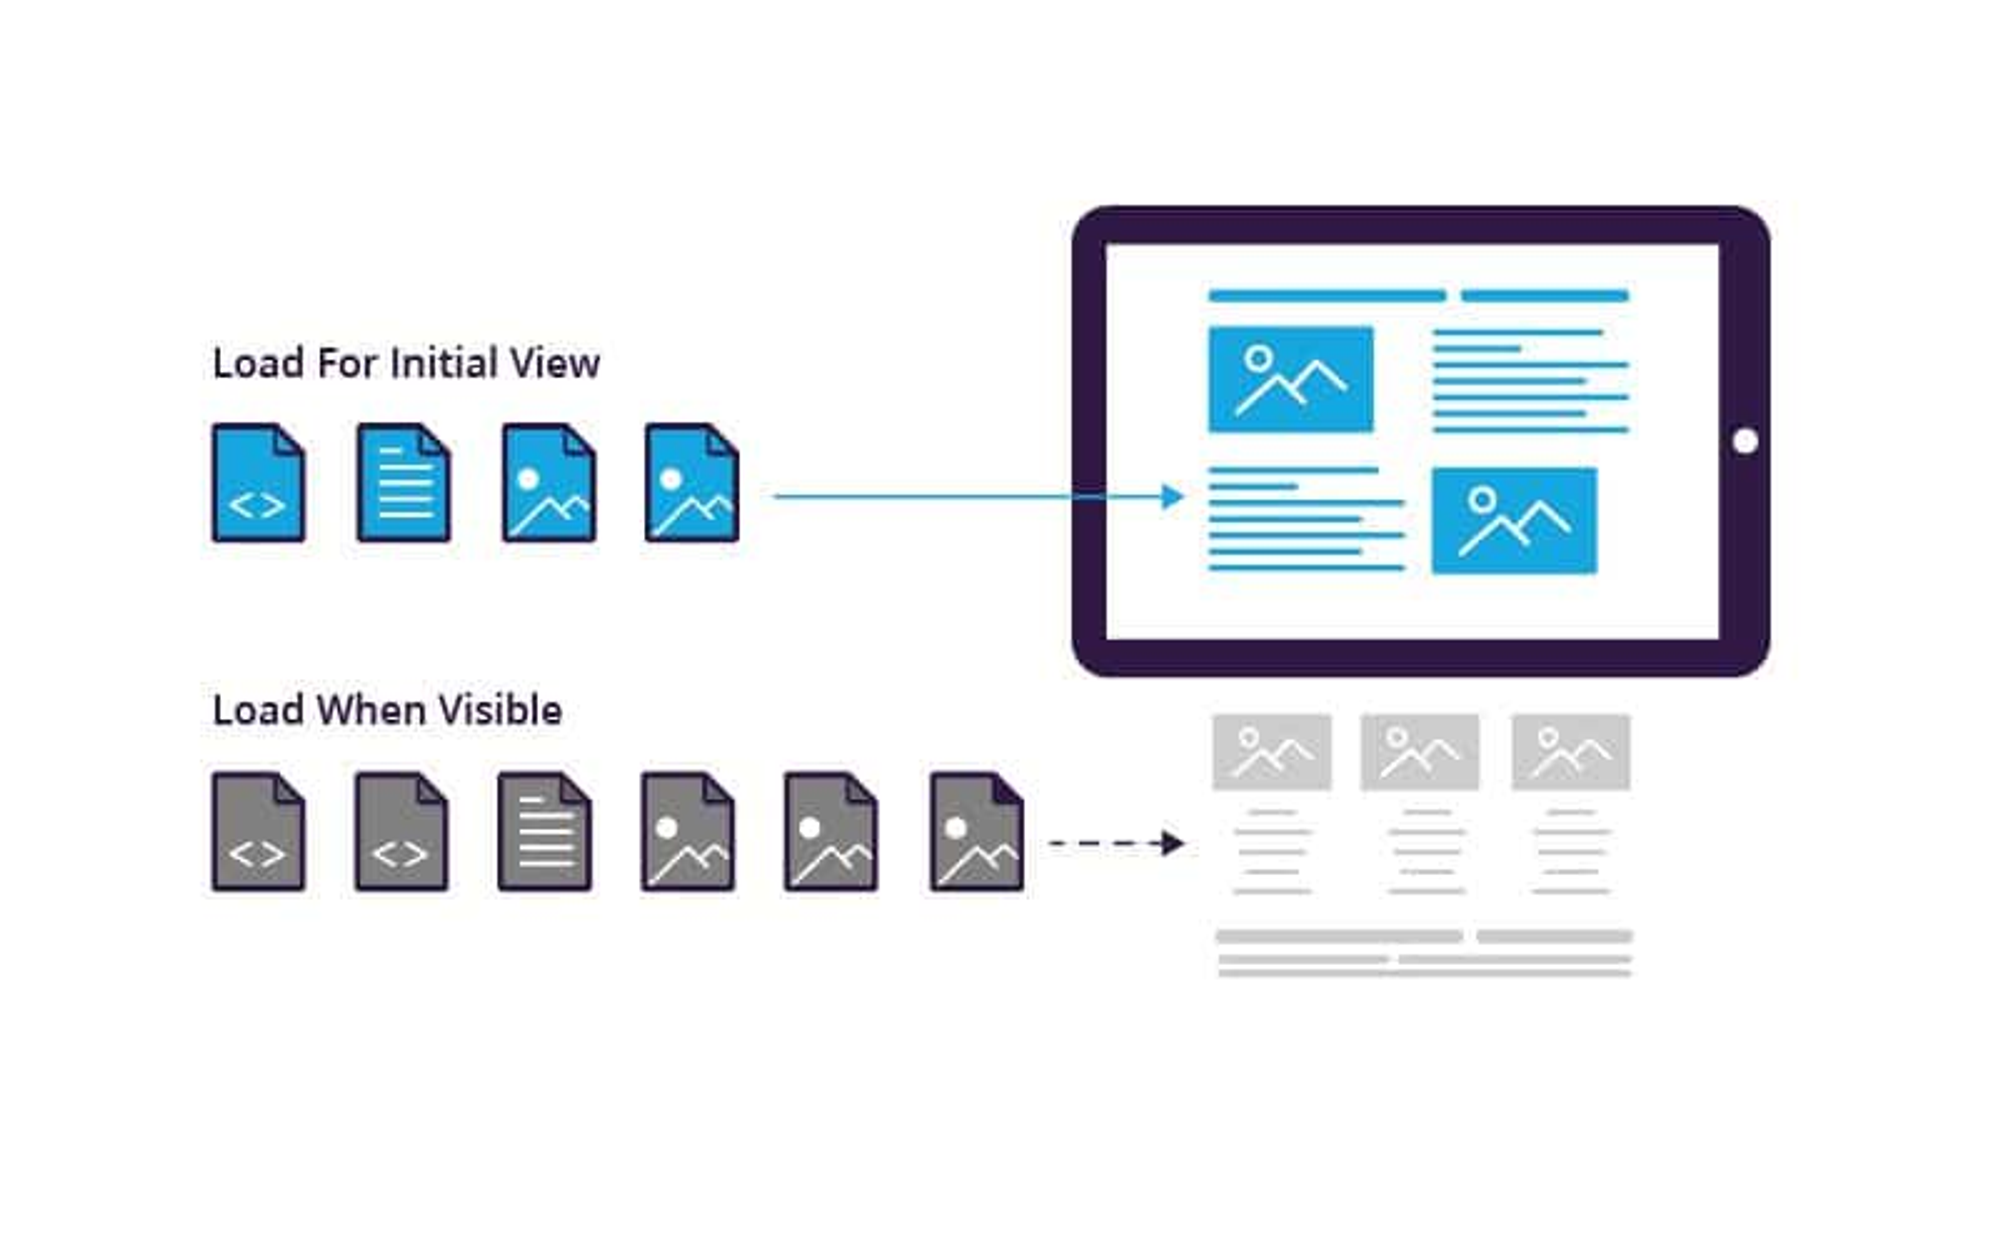
Imagine your eCommerce site as a fashionable backpack. Now, picture the videos on your pages as five-pound rocks.
How many can you fit in your backpack? 10? 15? A 100?
Can you even lift it at this point?
That’s what you’re doing to your website every time you add a 30-second product clip or testimonial. Your pages are so bogged down by all that weight that they can barely load before a customer clicks off.
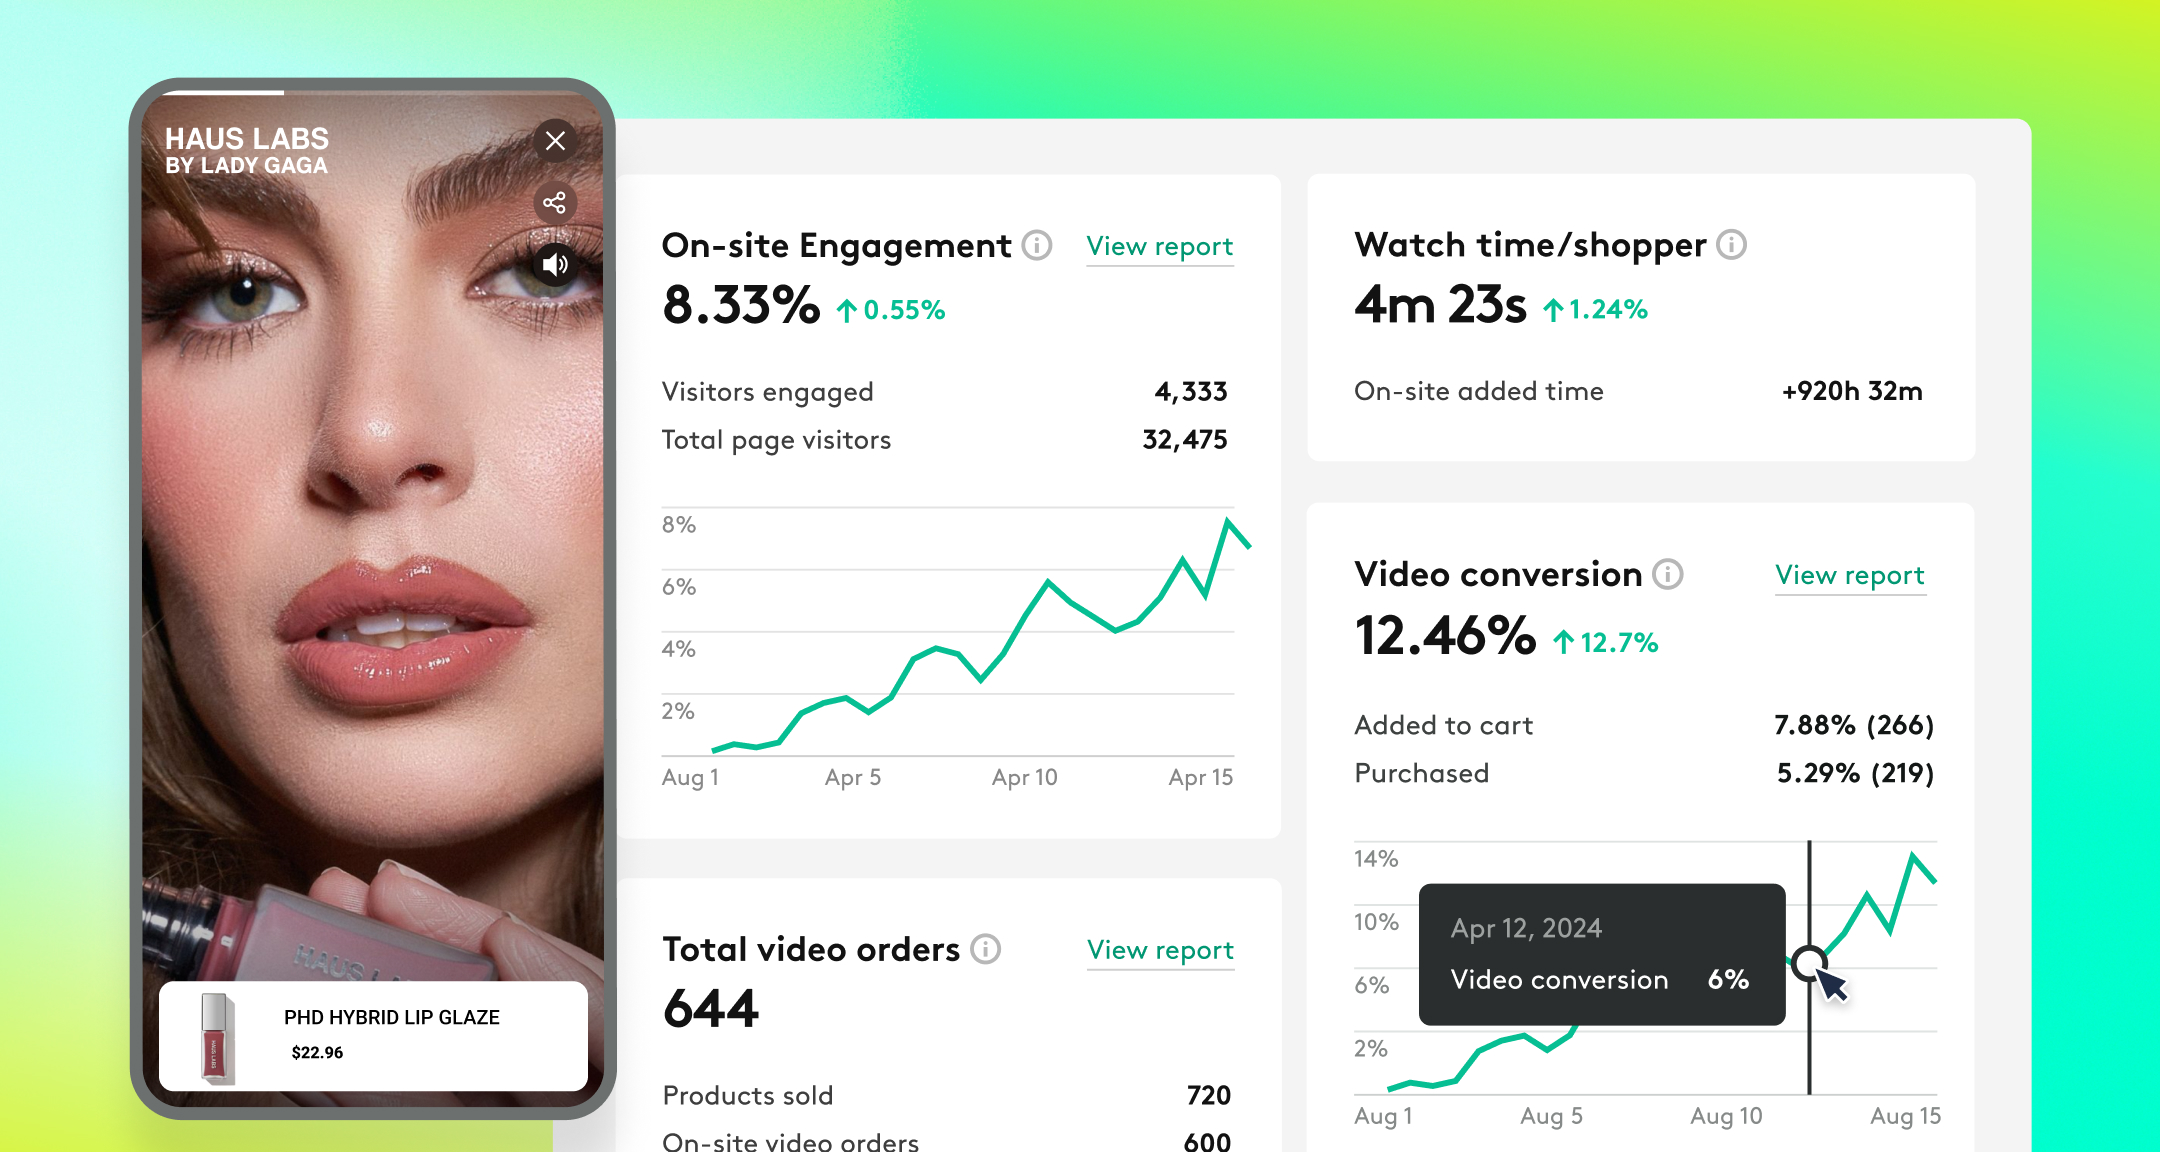
But if you opt for video compression and optimization, you avoid that issue entirely. Better yet, you show up on search queries more often.
This article breaks it all down for you. Let’s get started!
Does page load speed really matter for eCommerce brands?
Every time a user visits your eCommerce store, their request first jumps through four hoops. Take a look at the image below to understand this better.
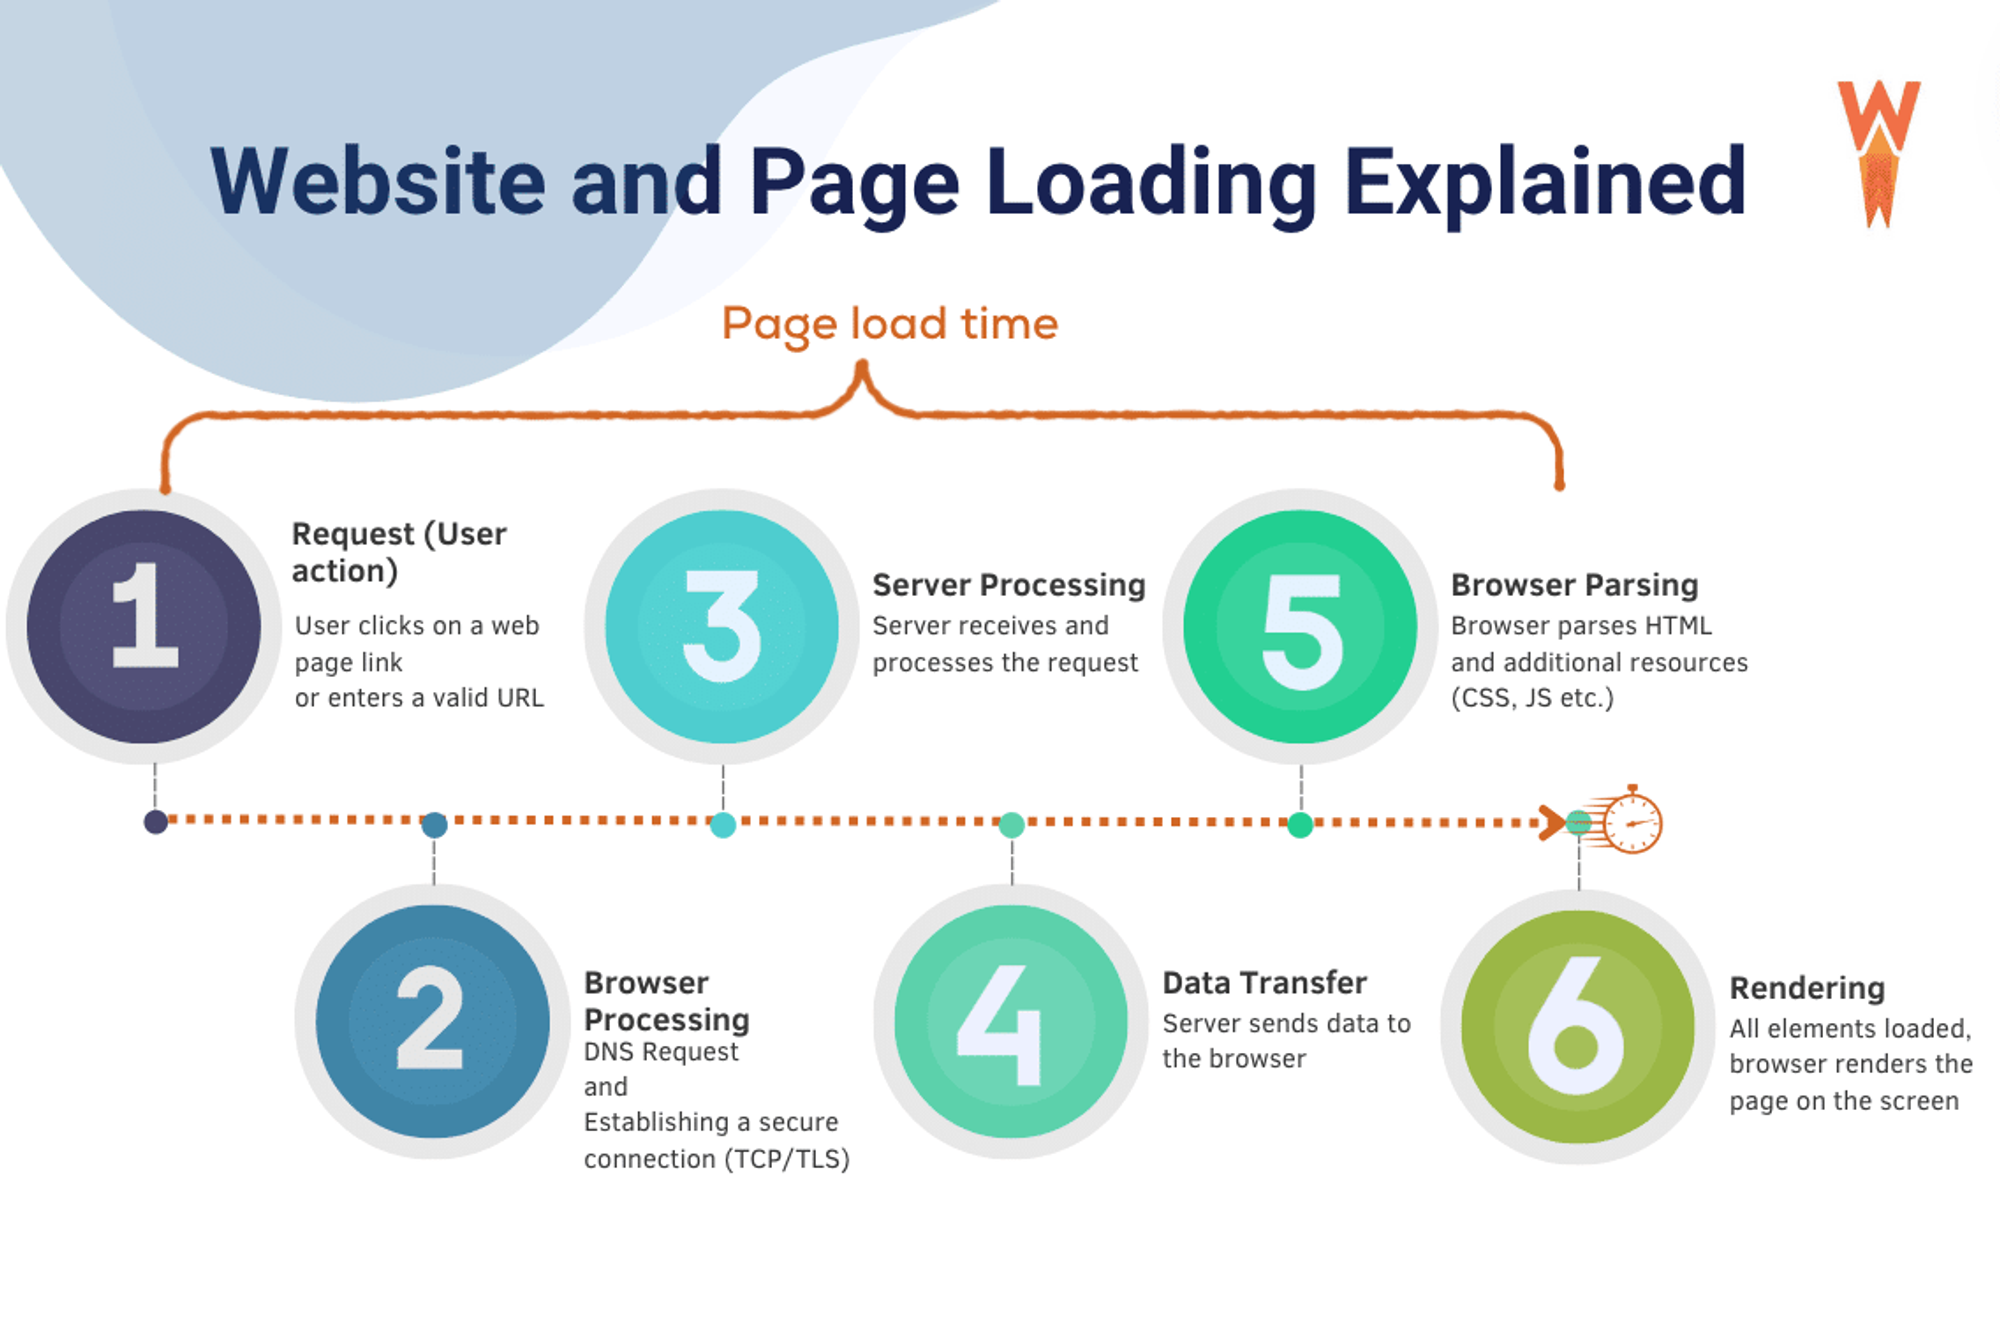
Essentially, the more media content your pages have, the longer they take to render. Images have some impact here, but videos affect this significantly more. And if they add even two seconds to your load time, your largest contentful paint (LCP) score takes a massive dip.
That’s one of the Core Web Vitals Google uses to track your page performance and determine your SERP rankings. So, the poorer the results, the less your products show up on search queries.
But here’s the real kicker: sites that load in one second have 3x the conversions than pages that take five seconds or more. So, as an eCommerce brand, if you aren’t prioritizing website speed, you’re leaving money on the table.
8 tips to simplify video compression and optimization
To provide a comprehensive overview, we’ve broken our tips into three different categories. The first is about establishing a solid foundation and related to file formats, content delivery, and hosting.
The second involves compression and video embedding techniques. The third category includes general pointers to streamline resolution scaling and bitrate adjustment.
1. Pick the right video file formats to streamline compression
Effective video compression depends on the file type. Go about this the wrong way, and you’ll severely impact the resolution of your embedded clips and diminish the viewing experience.
So, it’d be better if you prioritize the right format for your content. And you’ve got some great options here, including:
- MPEG-4 (MP4): Offers universal browser/device compatibility & high compression
- HTML5: Supports native playback without plugins & is compatible with most browsers
- WebM: Known for its small file sizes but requires additional plugins
- AVI: Has a low compression rate but is ideal for high-resolution footage
Generally, MP4 or HTML5 will work well with most of your clips. Both are versatile video file formats and are well-suited for progressive downloads and streaming. Trimming content also helps, but you should avoid it if you don’t want footage that seems disjointed.
2. Use a CDN (content delivery network) to boost page speed
If, for some reason, you have to hold off on video optimization for your eCommerce store, you can still increase your page speed with a CDN.
These are massive systems with data centers spread across multiple geographic locations. They replicate your media content and store it on their edge servers. So, when a user sends a request, the CDN delivers the material through the server closest to them.
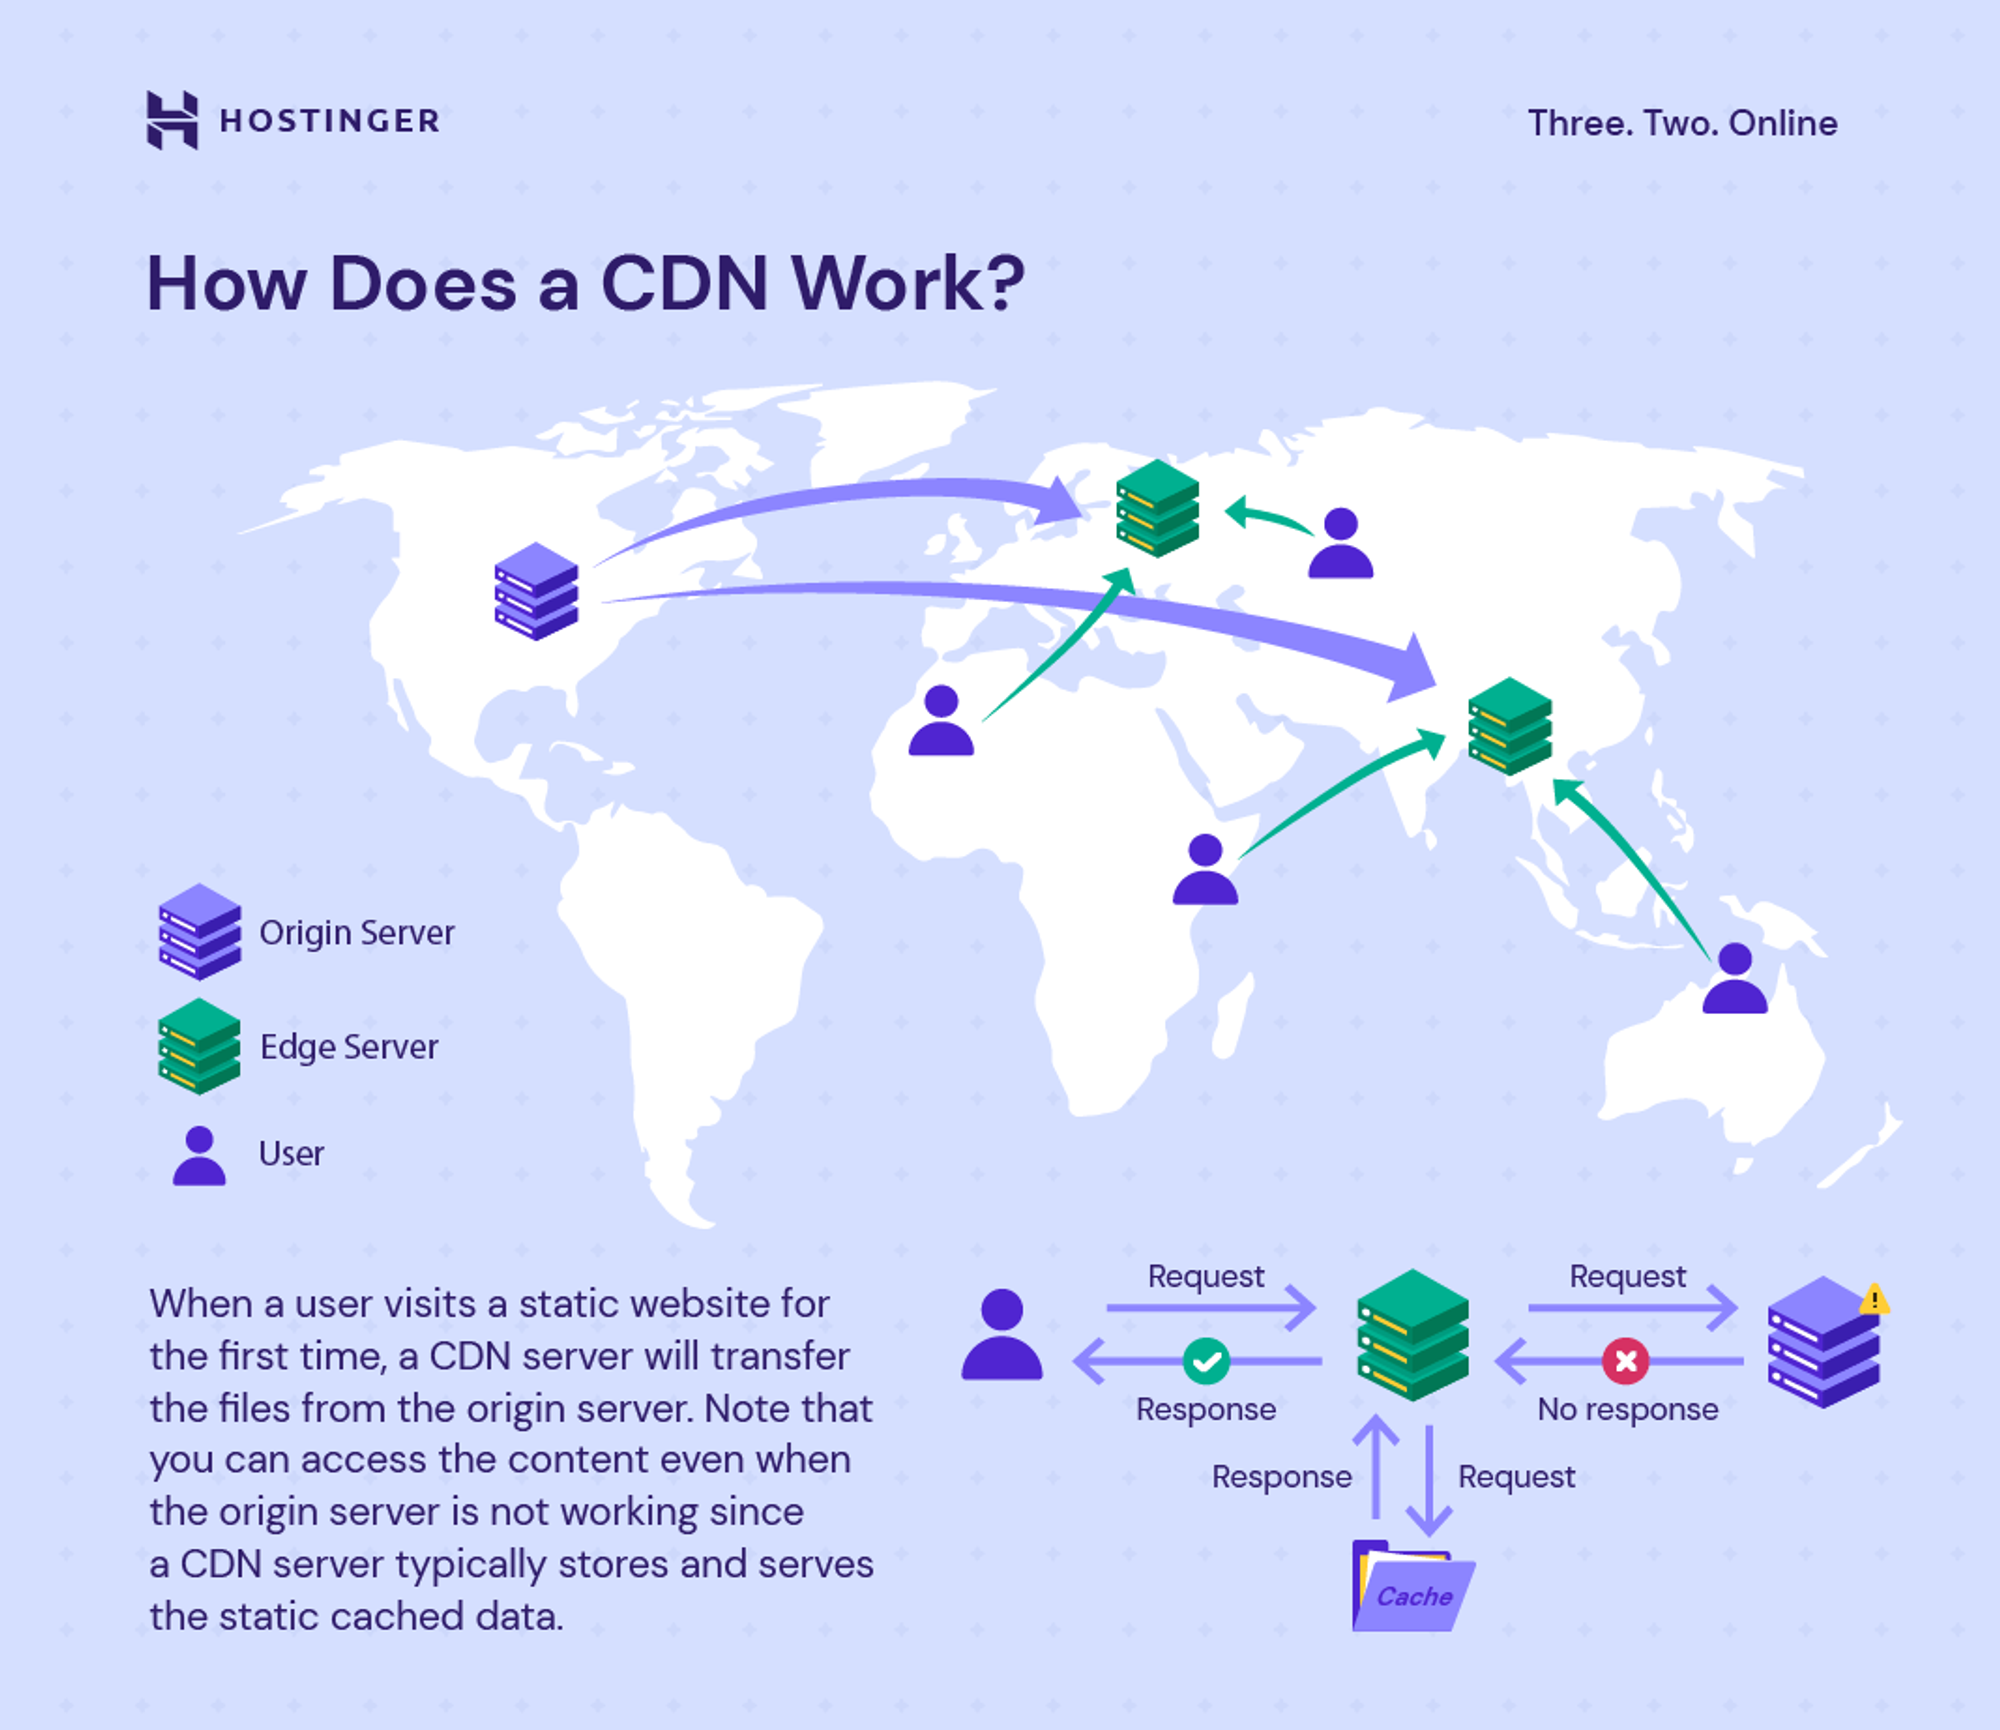
This way, your pages have reduced latency. More importantly, since CDNs can handle concurrent video requests in large volumes, they minimize the processing strain on your host/origin server.
3. Ditch shared hosting & switch to dedicated servers
Bitrate adjustment, adaptive streaming, and even the most creative video embedding techniques will not help if you stick to shared hosting. Because, at its core, it has you fighting for load speed and page performance with a dozen other websites.
What you need instead are dedicated servers. This will direct all available resources into rendering and loading your media content faster.
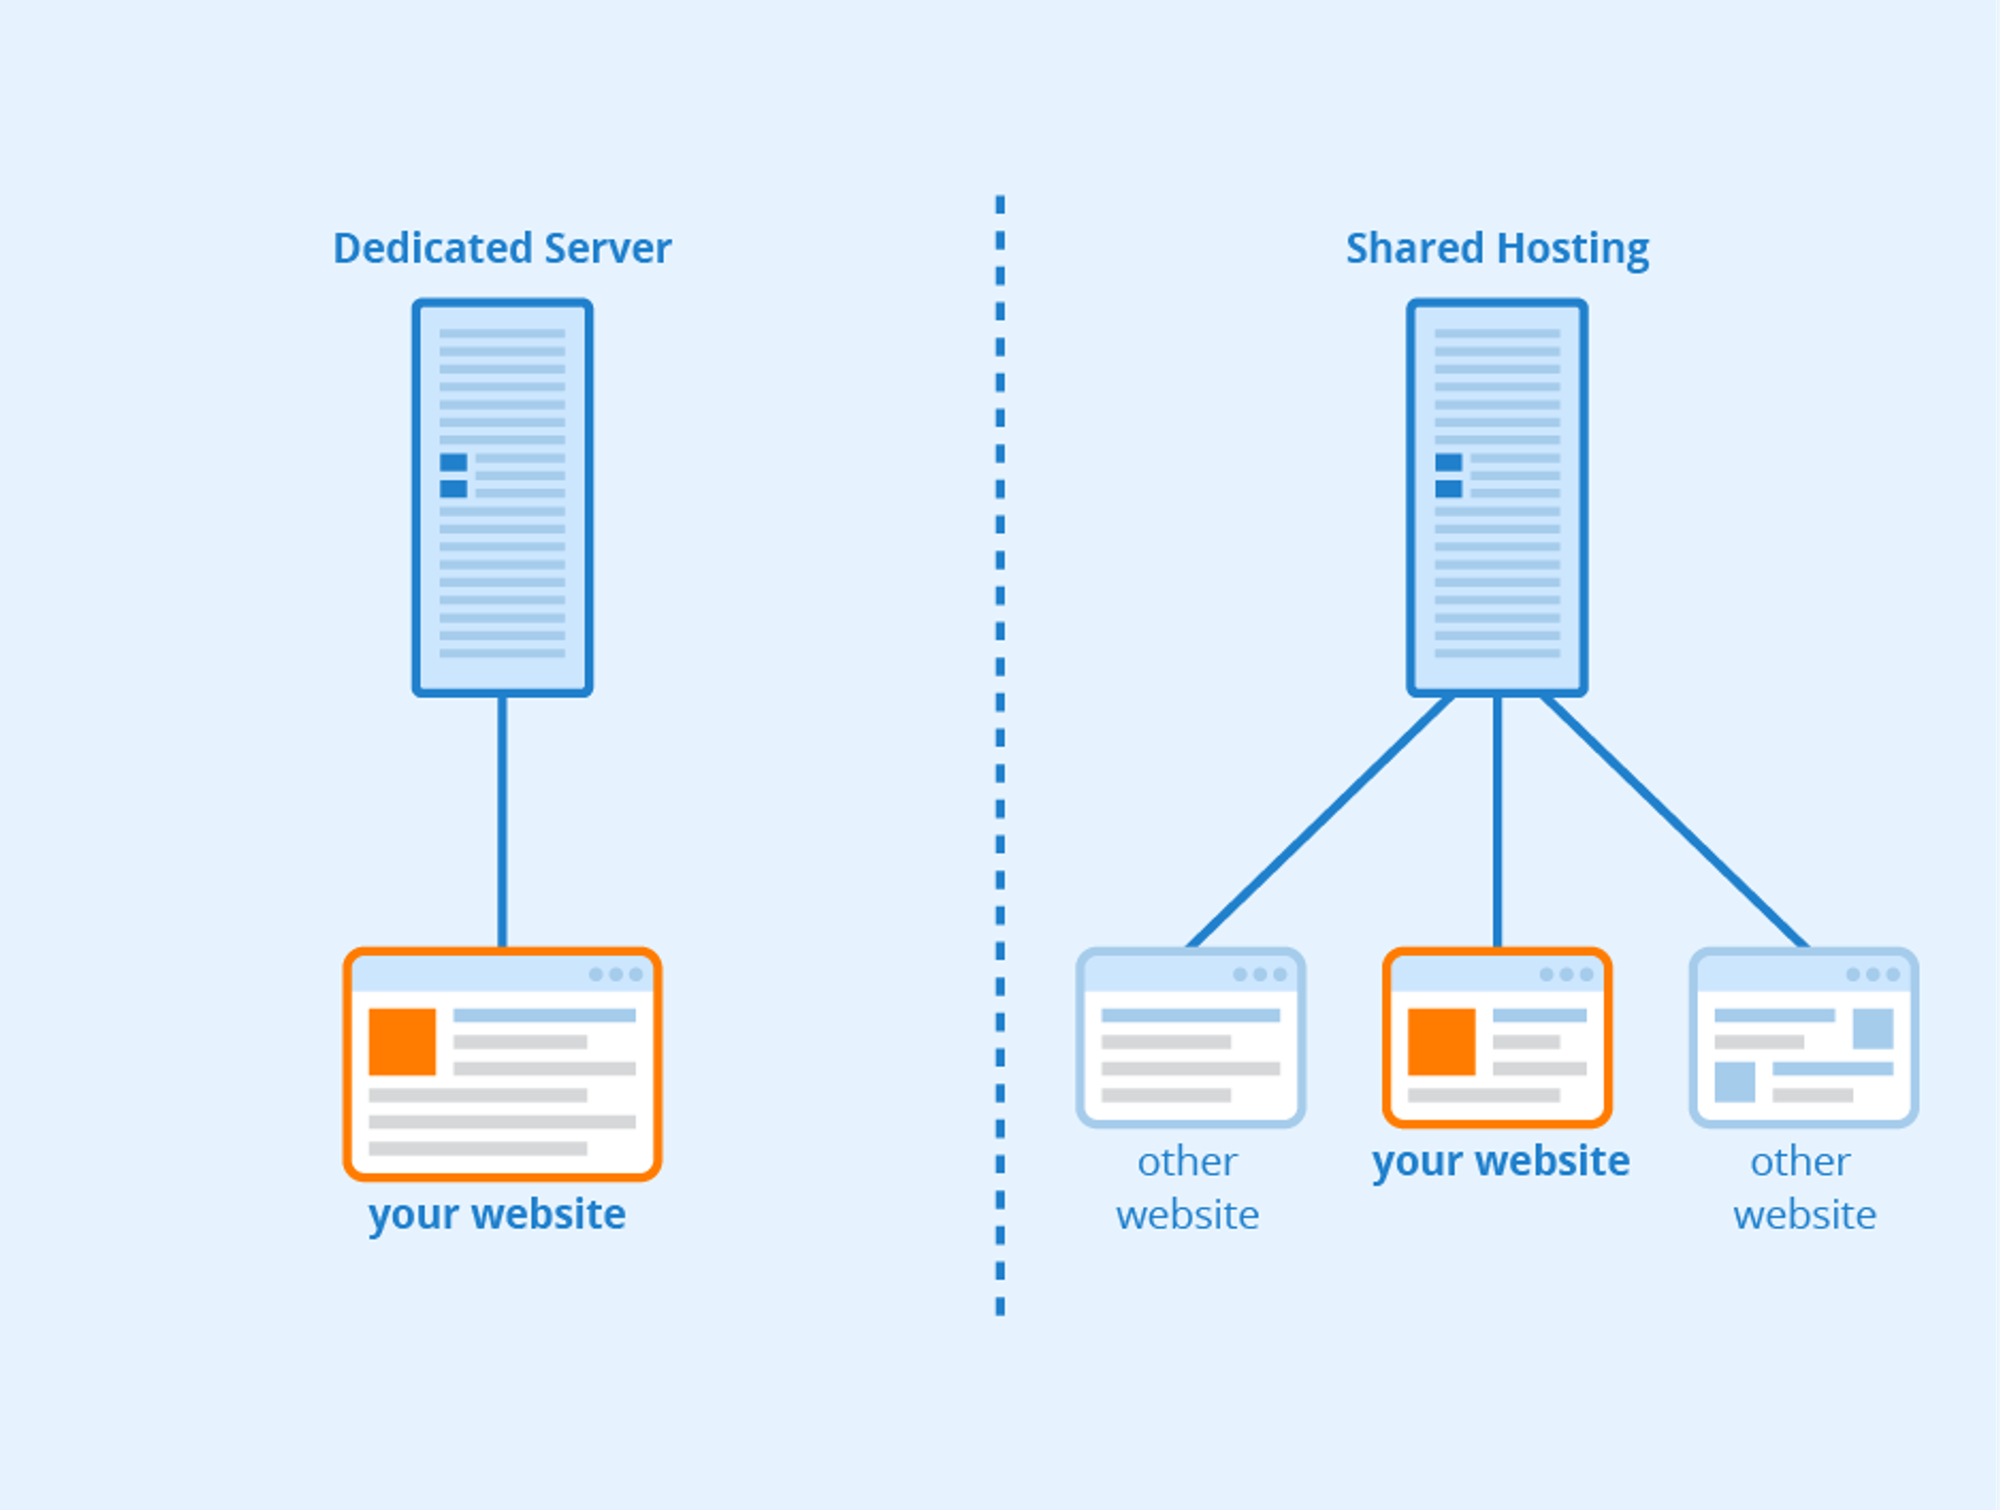
That said, dedicated servers can be expensive. So, if they don’t fit into your current budget, you can still use caching plugins for minor page speed boosts. This, however, will not help with your backend latency.
4. Use the HandBrake software for seamless video file conversion & compression
Plenty of video compression tools let you reduce the file size or convert them into a different codec. The open-source HandBrake software, though, is one of the best available options.
Here’s a step-by-step guide on how to use the program to compress your clips into the MP4 format:
- Click on ‘Open Source’ on the top bar
- Select the video file you want
- Click on the ‘Presets’ menu and pick ‘Fast 1080p 30’
- In the ‘Video’ tab, choose the following settings:
- Video codec: H.264
- FPS: Same as source
- Constant framerate
- Constant quality: 22 RF
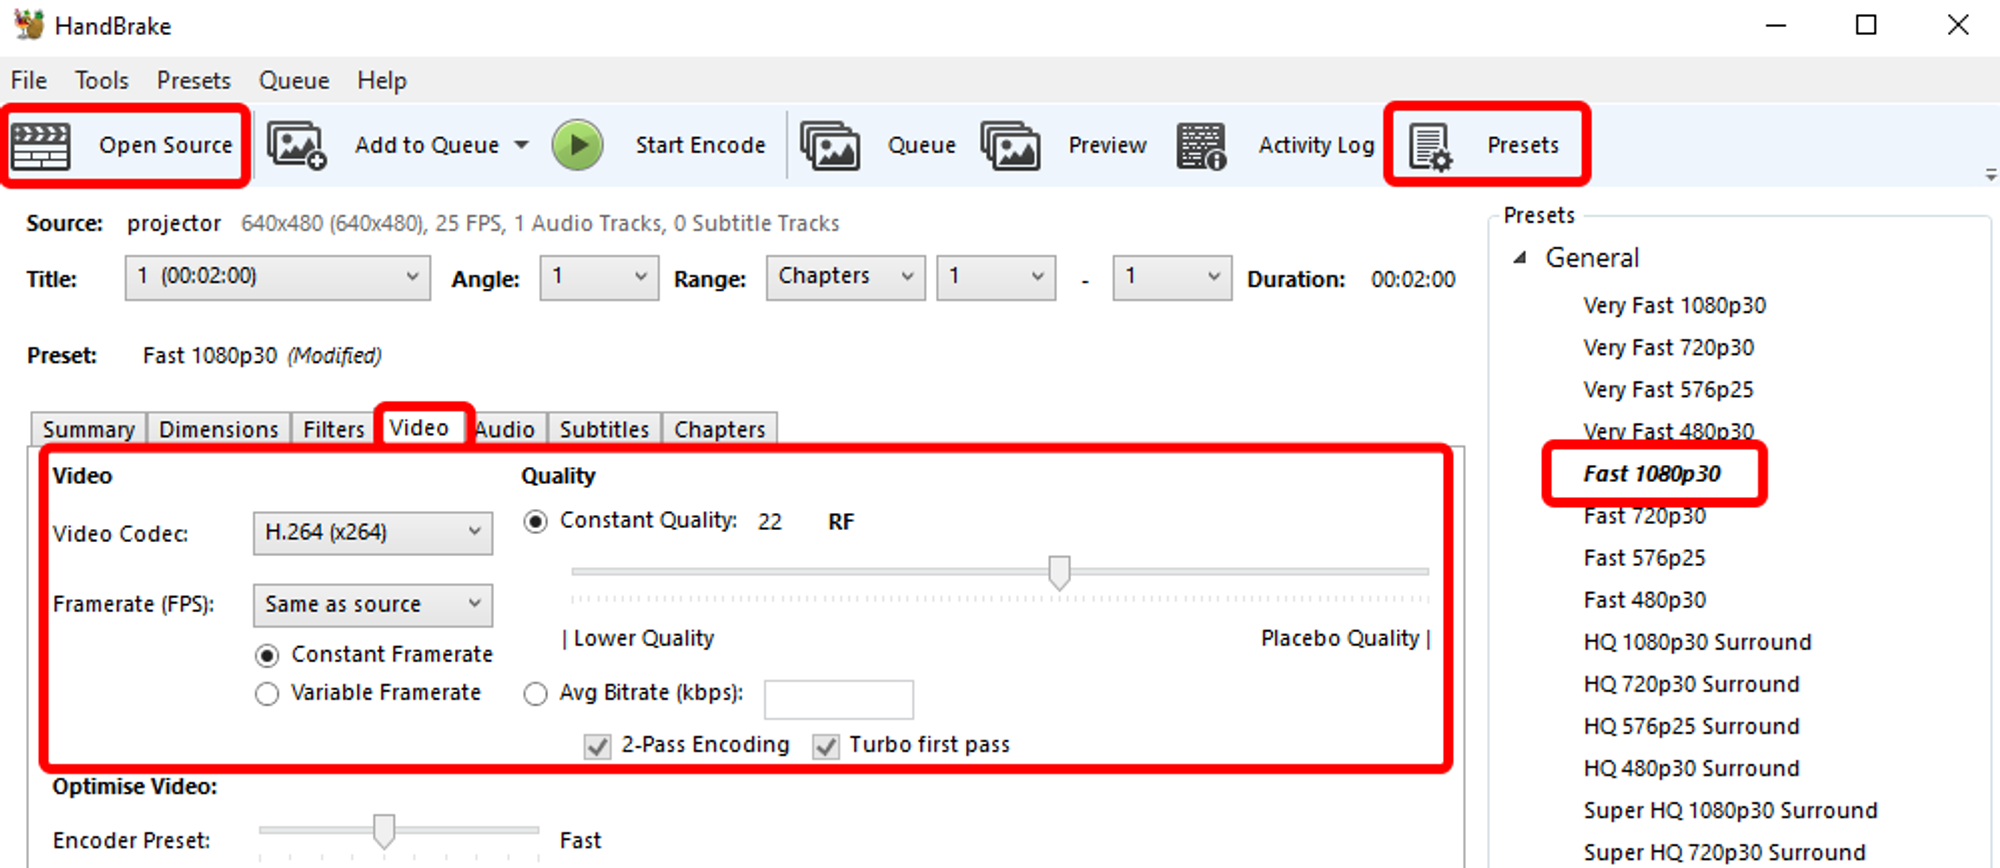
Once that’s done, head to the ‘Audio’ menu and select a bitrate of 192 or 160 (depending on your preference)
Then, open the ‘Summary’ tab and check the box that says ‘Web Optimized’.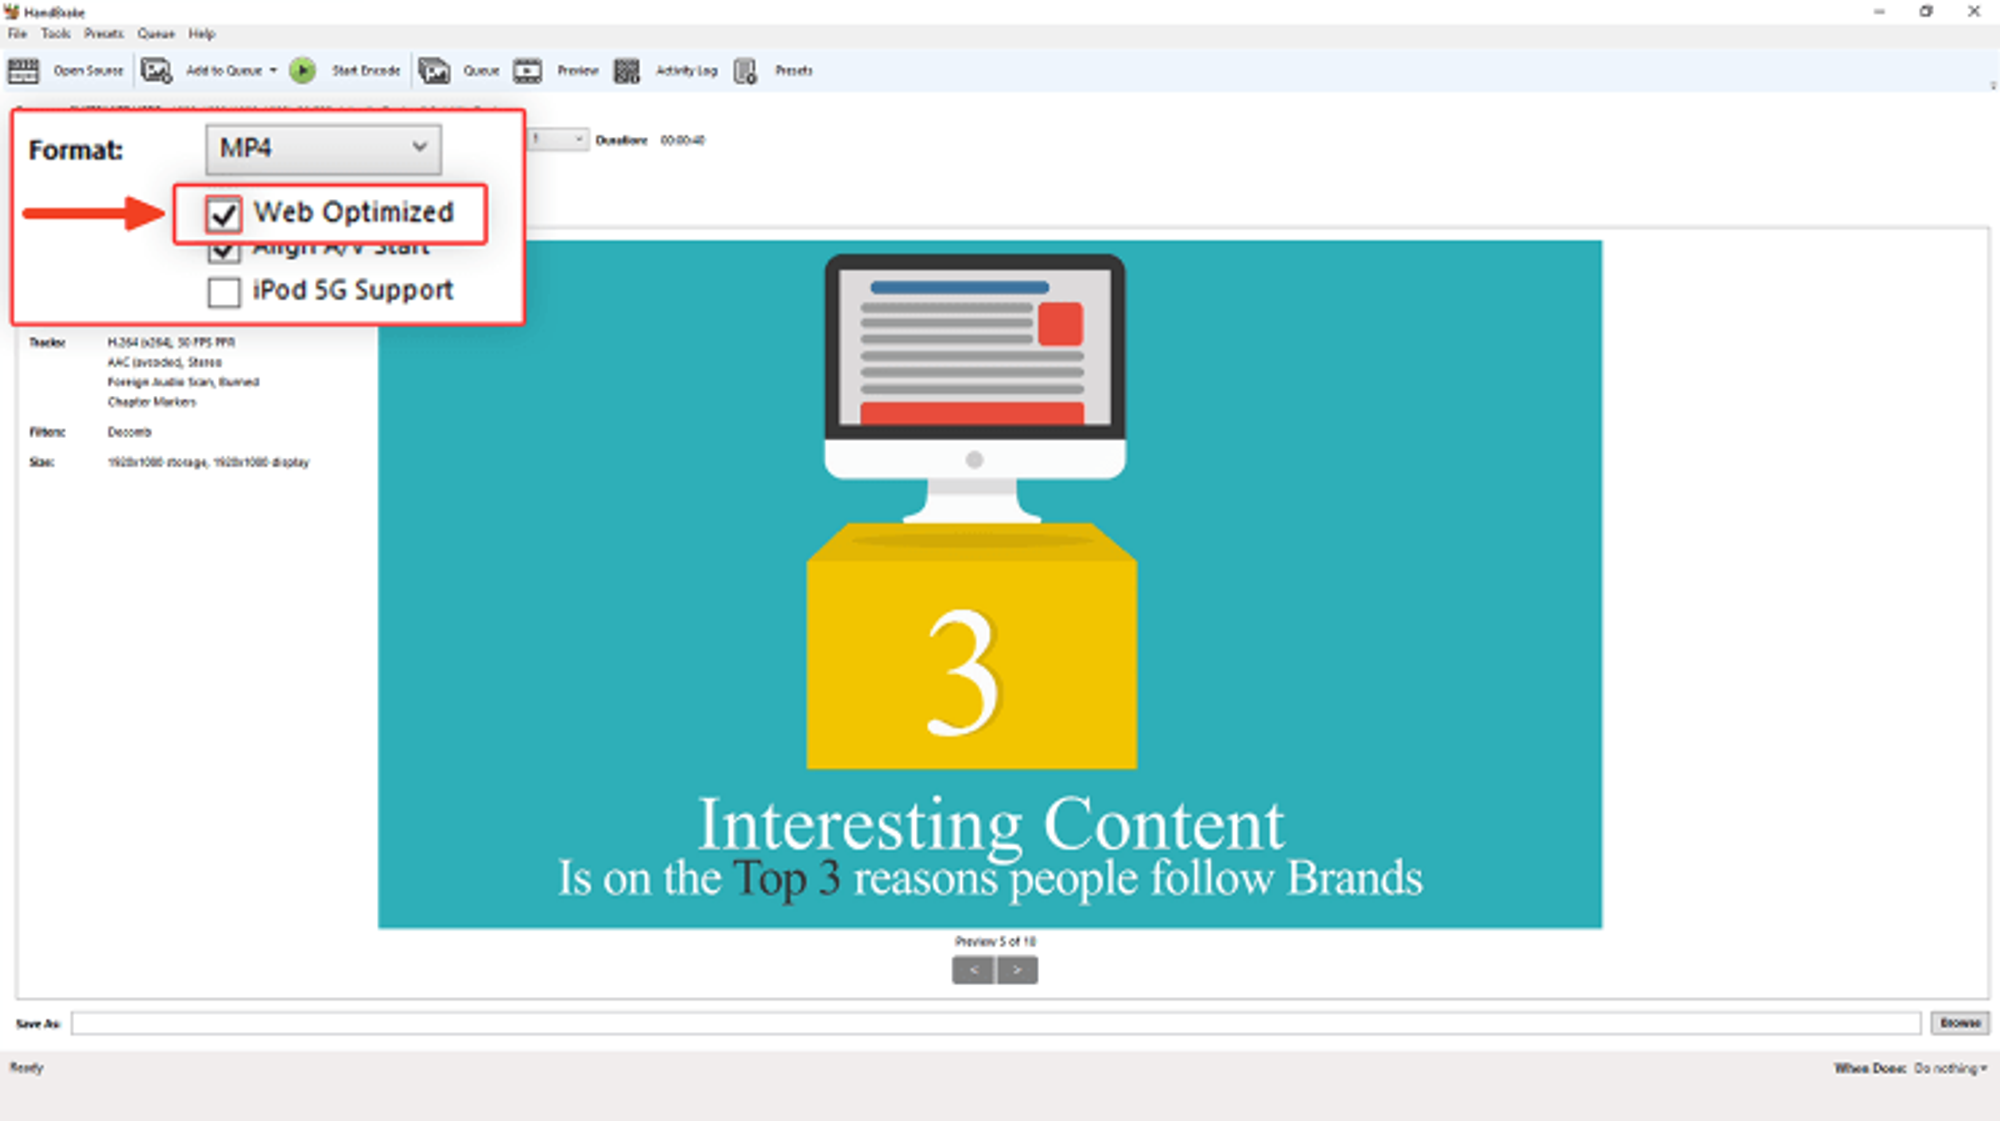
Hit the ‘Start Encode’ button once you’ve gone through all those settings. This will automatically convert your clip into the MP4 format.
And, since you selected ‘Web Optimized’, the encoded file will have progressive downloading enabled. In short, users won’t have to wait for the client to retrieve your content and can watch it instantly.
5. Embed 3rd-party hosted content to maximize page performance
You can host videos on 3rd-party platforms and then embed them to boost page load speed. To do this, opt for any of the popular sites, such as YouTube, DailyMotion, or Vimeo.
Once you’ve picked one, you need a lightweight video player to embed those clips on your pages. If you’re using WordPress, the default Gutenberg editor offers one for all three.
Shopify also has several widgets available on the app store. Here are a few of them:
- Widgetic (free plan available/$5.99 per month for Premium)
- Vidjet ($49 per month with a 14-day free trial)
- EasyVideo ($15 per month with a 7-day free trial)
There’s also ReelUp, which is exclusively for embedding TikTok or Instagram clips. Its ‘Starter’ package is $19.99 per month, but there’s a free plan available for users. The only issue is that it comes with a watermark.
6. Balance your video preloading and lazy loading setup
Video preloading can improve your load speed while ensuring a smooth viewing experience. It eliminates buffering and is especially useful for mouseover clips or carousel sections.
A simple tip here is to ensure that preloading only retrieves the metadata and excludes the frames themselves. This will help significantly with your LCP score.
Remember, though, preloading all your media content would be counterproductive. Instead, stick to assets crucial to the user experience (UX) or product videos and pages.
As for lazy loading, pick content that doesn’t see frequent engagement from visitors. The ‘about us’ section or ‘success stories/case studies’ are some examples here. This will reduce the requests on the load queue and considerably boost your site speed.
Similar to preloading, not all your videos are meant to be lazy-loaded. Specifically, avoid doing it for any clips on your homepage. Most of all, don’t embed any autoplay videos. Not only do they strain page load speeds, but they are also distracting and can take away from the UX.
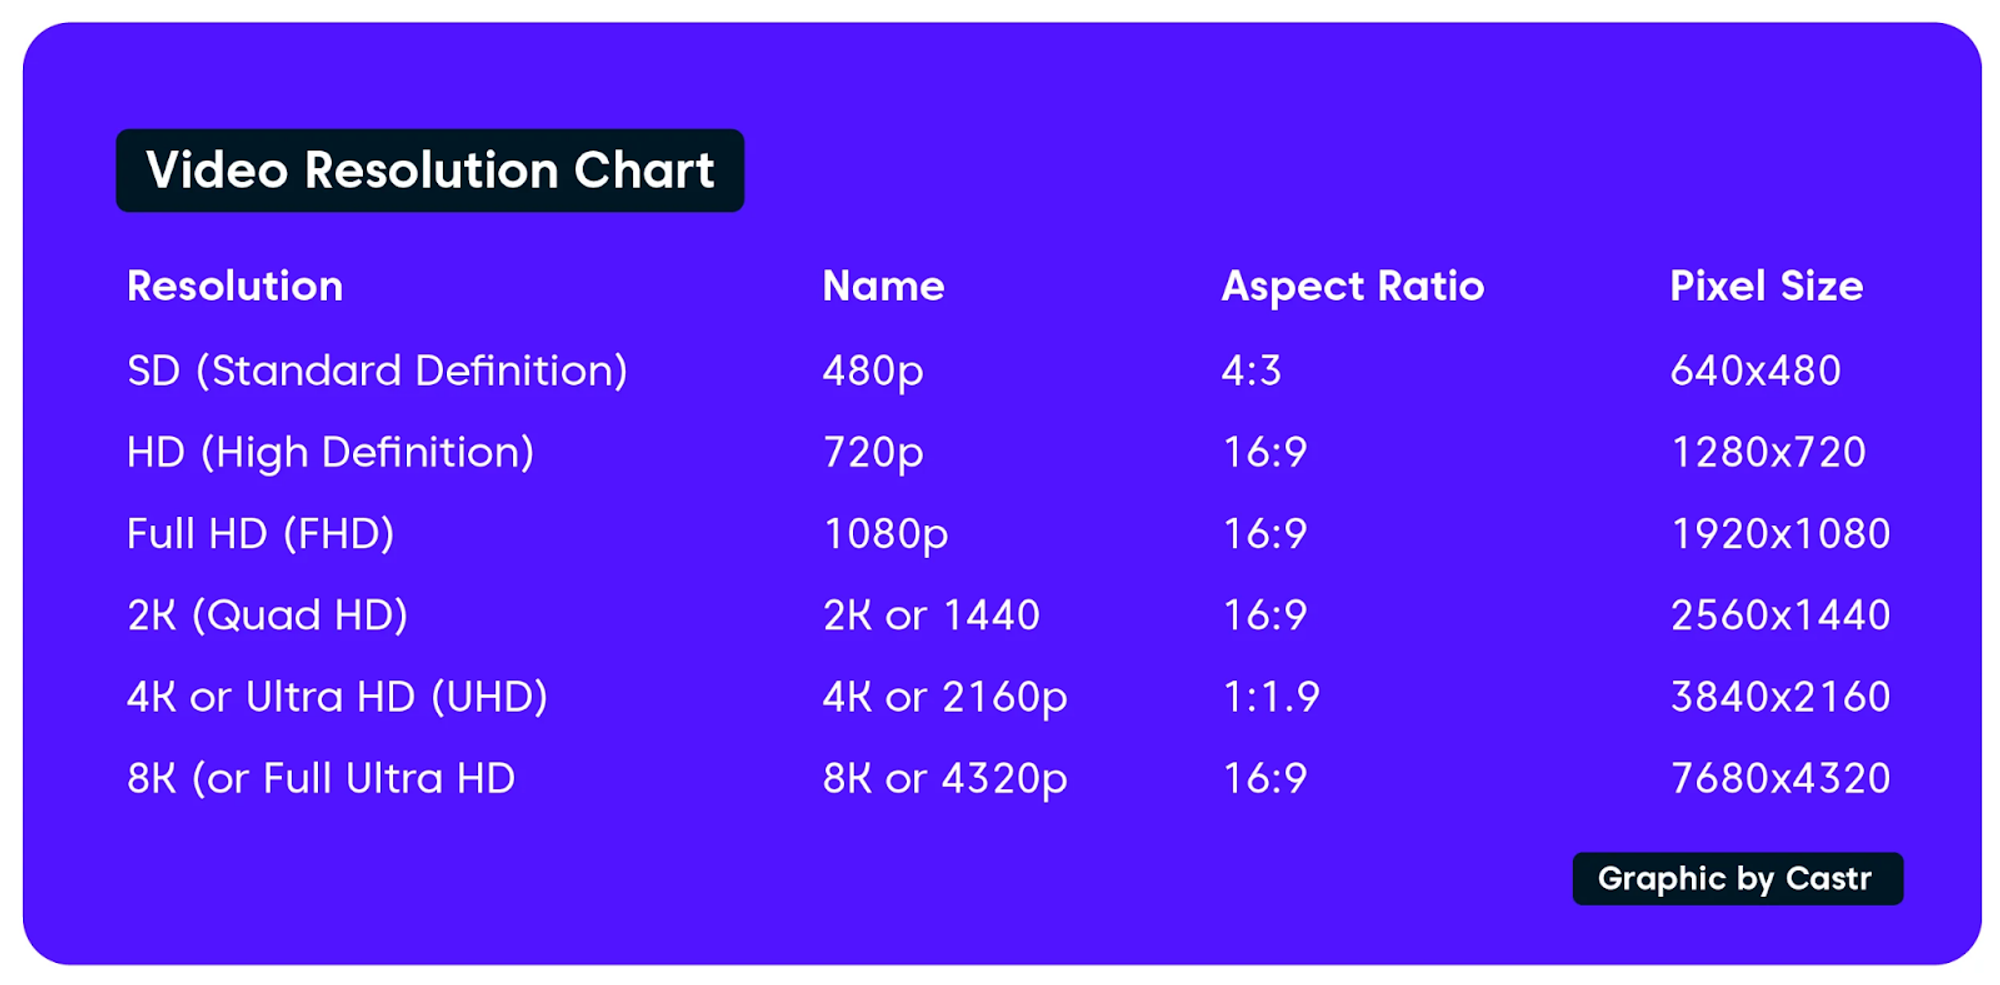
7. Keep your video resolution fixed at 720p for better device compatibility
Most sites opt for 1080p clips when embedding footage on their pages since desktops now support Full HD (FHD) quality. However, as an eCommerce brand, your approach to choosing a video resolution will be entirely different.
The reason is simple.
Research shows that 76% of consumers prefer shopping with their smartphones. And the numbers get even more skewed when you consider individuals in the 18-29 (87%) and 30-49 (92%) age bracket.
In short, it’s best to keep your videos optimized for mobile viewing. This will also ensure that the file sizes for your clips aren’t too large.
8. Adjust your bitrate to improve bandwidth consumption
A bitrate adjustment goes a long way when it comes to video optimization and compression. It’s especially helpful when visitors use different devices to engage with your site. For instance, mobile shoppers may rely on remote networks to view your pages.
One option here is to set a constant bitrate for all your content. So, as a rule, you want:
- 1-2 Mbps for 720p with 30 FPS (best to stick to this)
- 3-5 Mbps for 1080p with 30 FPS
- 6-8 Mbps for HD/4K with 30 FPS
The alternative, and the better choice, is to go for adaptive streaming. This will automatically select the video quality based on the user’s network conditions and provide viewers with a smooth playback.
The best bit? This compresses the overall file size without you manually changing the resolution or trimming content length.
* This article was originally published here


